Last updated: April 2026
Creating your first 3D avatar in VRoid Studio is easier than you think. In this guide, I’ll walk you through the entire process from start to finish — from choosing your base model to saving your finished avatar — all in about 30 minutes.
What You’ll Need
- VRoid Studio installed and set to English (see our setup guide)
- About 30 minutes of free time
- No prior 3D modeling experience needed
Step 1: Create a New Model
From the VRoid Studio home screen, click the “+” tile labeled “New” in the top-left corner.
A dialog box will appear asking you to choose a base body type.
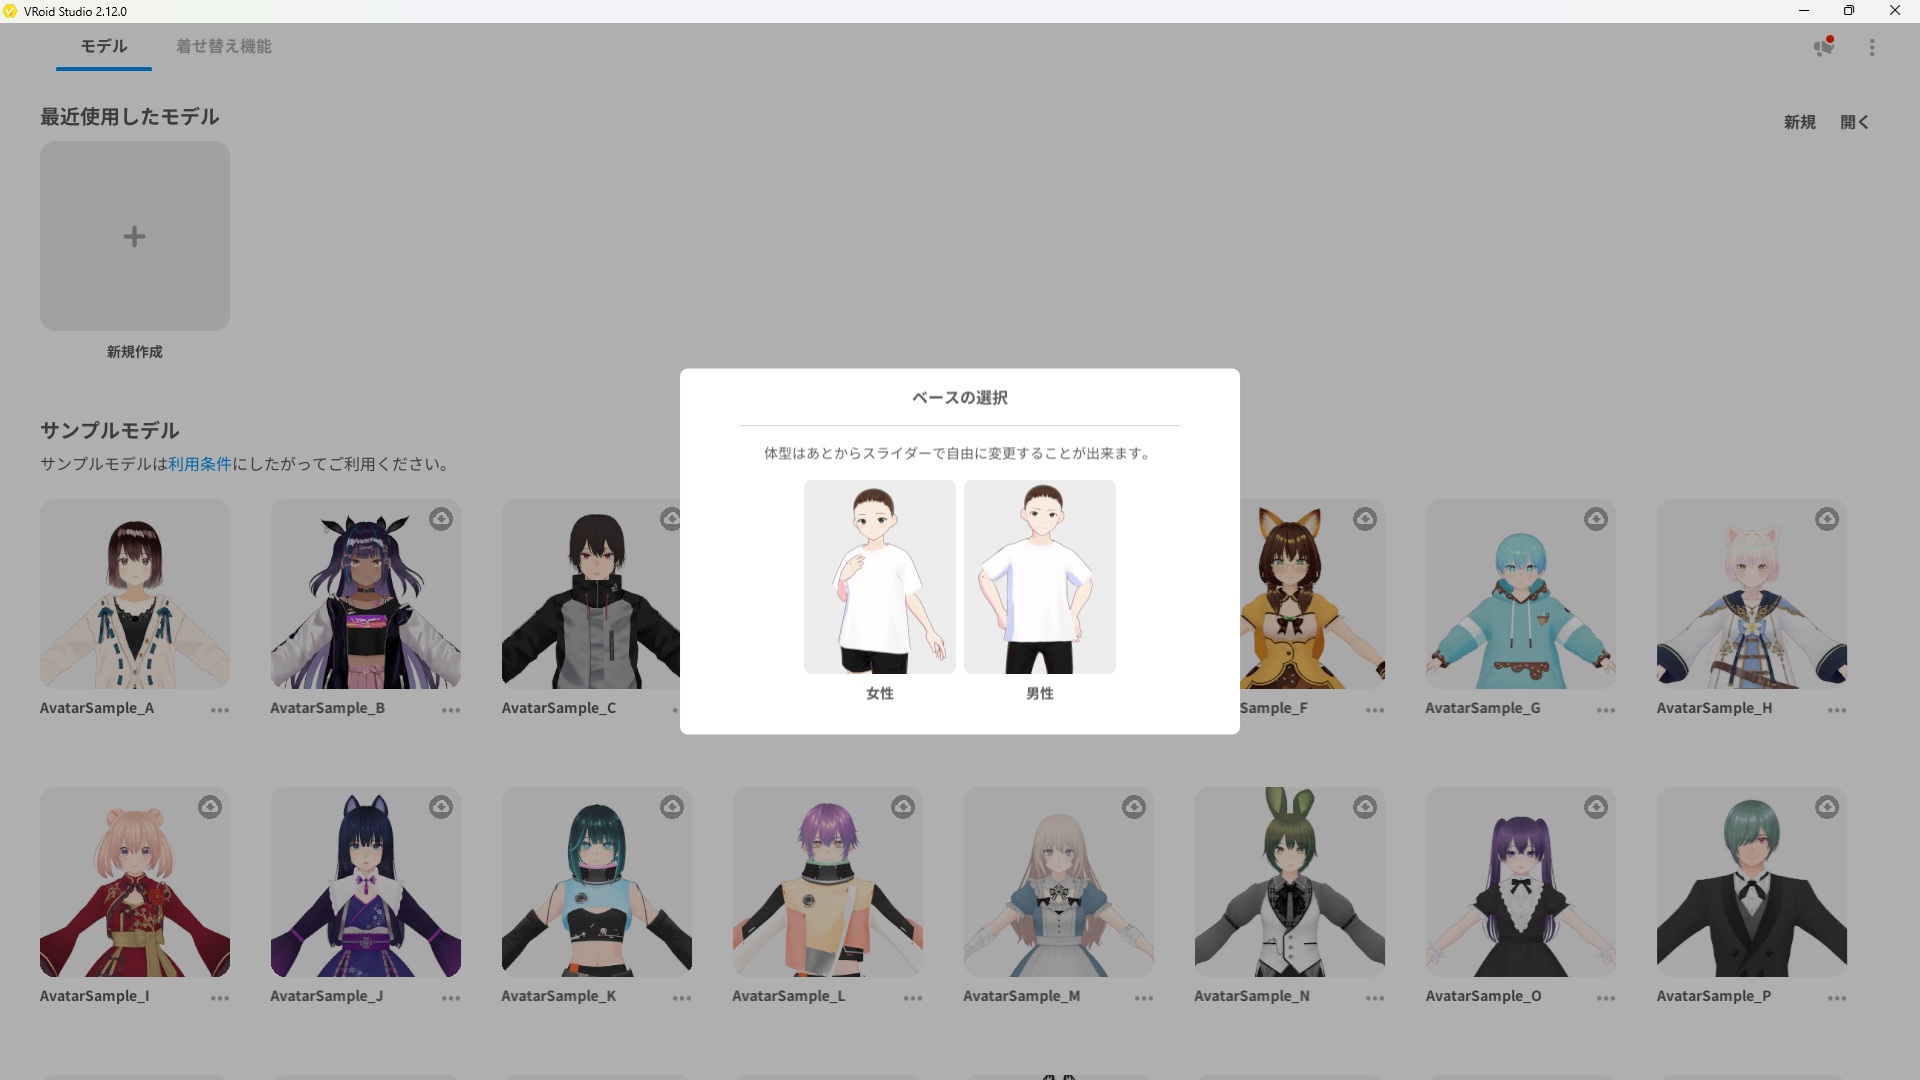
Choose Female or Male as your starting base. You can adjust body proportions later using sliders.
Select Female or Male depending on what you want to create. Don’t worry too much about this — body shape can be adjusted freely with sliders after you start.
Step 2: Customize the Face
After selecting your base, you’ll be taken directly to the Face editing screen. This is where you’ll choose your avatar’s facial features.
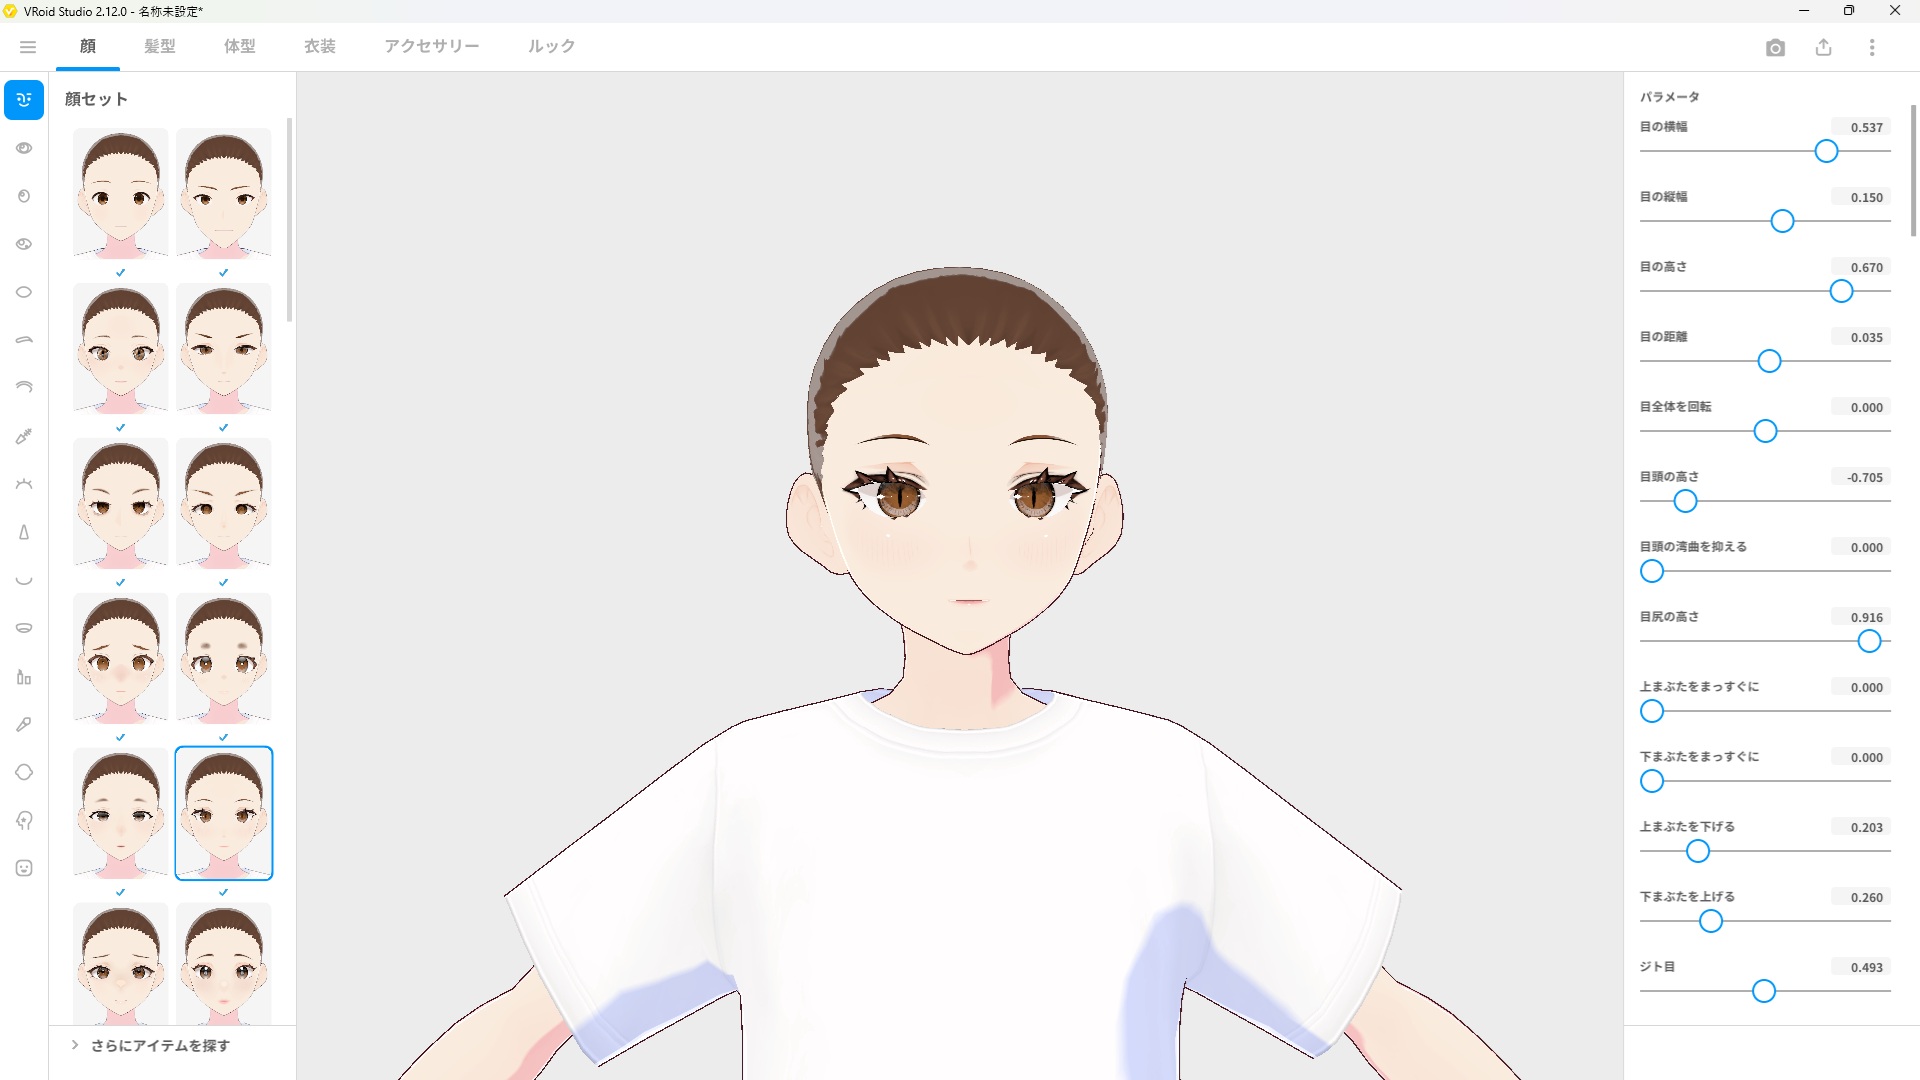
The left panel shows face presets. Click any preset to apply it instantly. Use the sliders on the right to fine-tune the details.
Here’s what to do:
- Browse the face presets in the left panel and click one you like
- The 3D preview in the center updates in real time
- Use the sliders on the right to adjust details like eye width, nose height, and mouth shape
- Click the icons on the far left to switch between subcategories (Eyes, Nose, Mouth, etc.)
Tip: For your first avatar, just pick a preset you like and move on. You can always come back and refine the details later.
Step 3: Choose a Hairstyle
Click the Hair tab at the top of the screen to switch to hair editing.
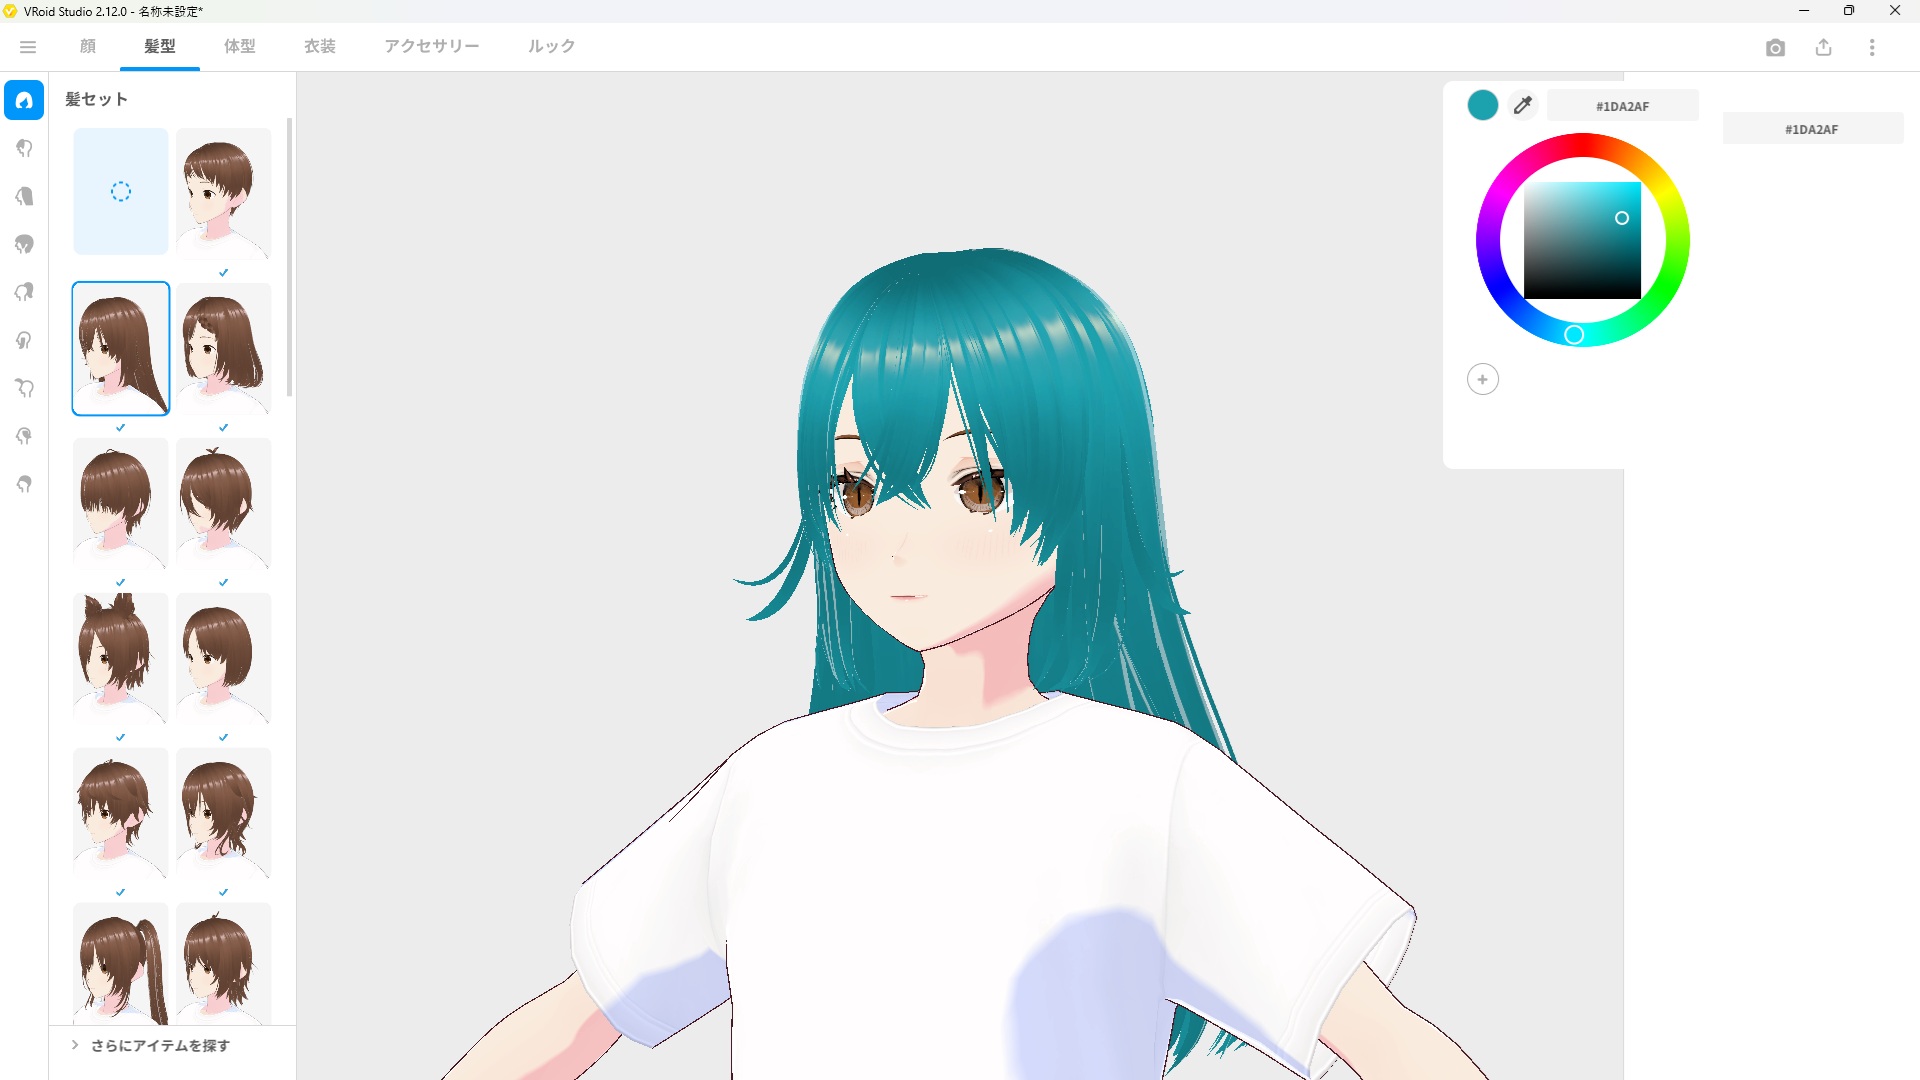
Select a hairstyle from the presets on the left. The color picker on the right lets you change the hair color instantly.
Browse the hair presets and click one to apply it. To change the hair color, click the color circle in the top-right area to open the color picker. You can type in a hex color code directly for precise control — for example, #1DA2AF for a teal color.
Step 4: Pick an Outfit
Click the Outfit tab at the top to move to clothing customization.
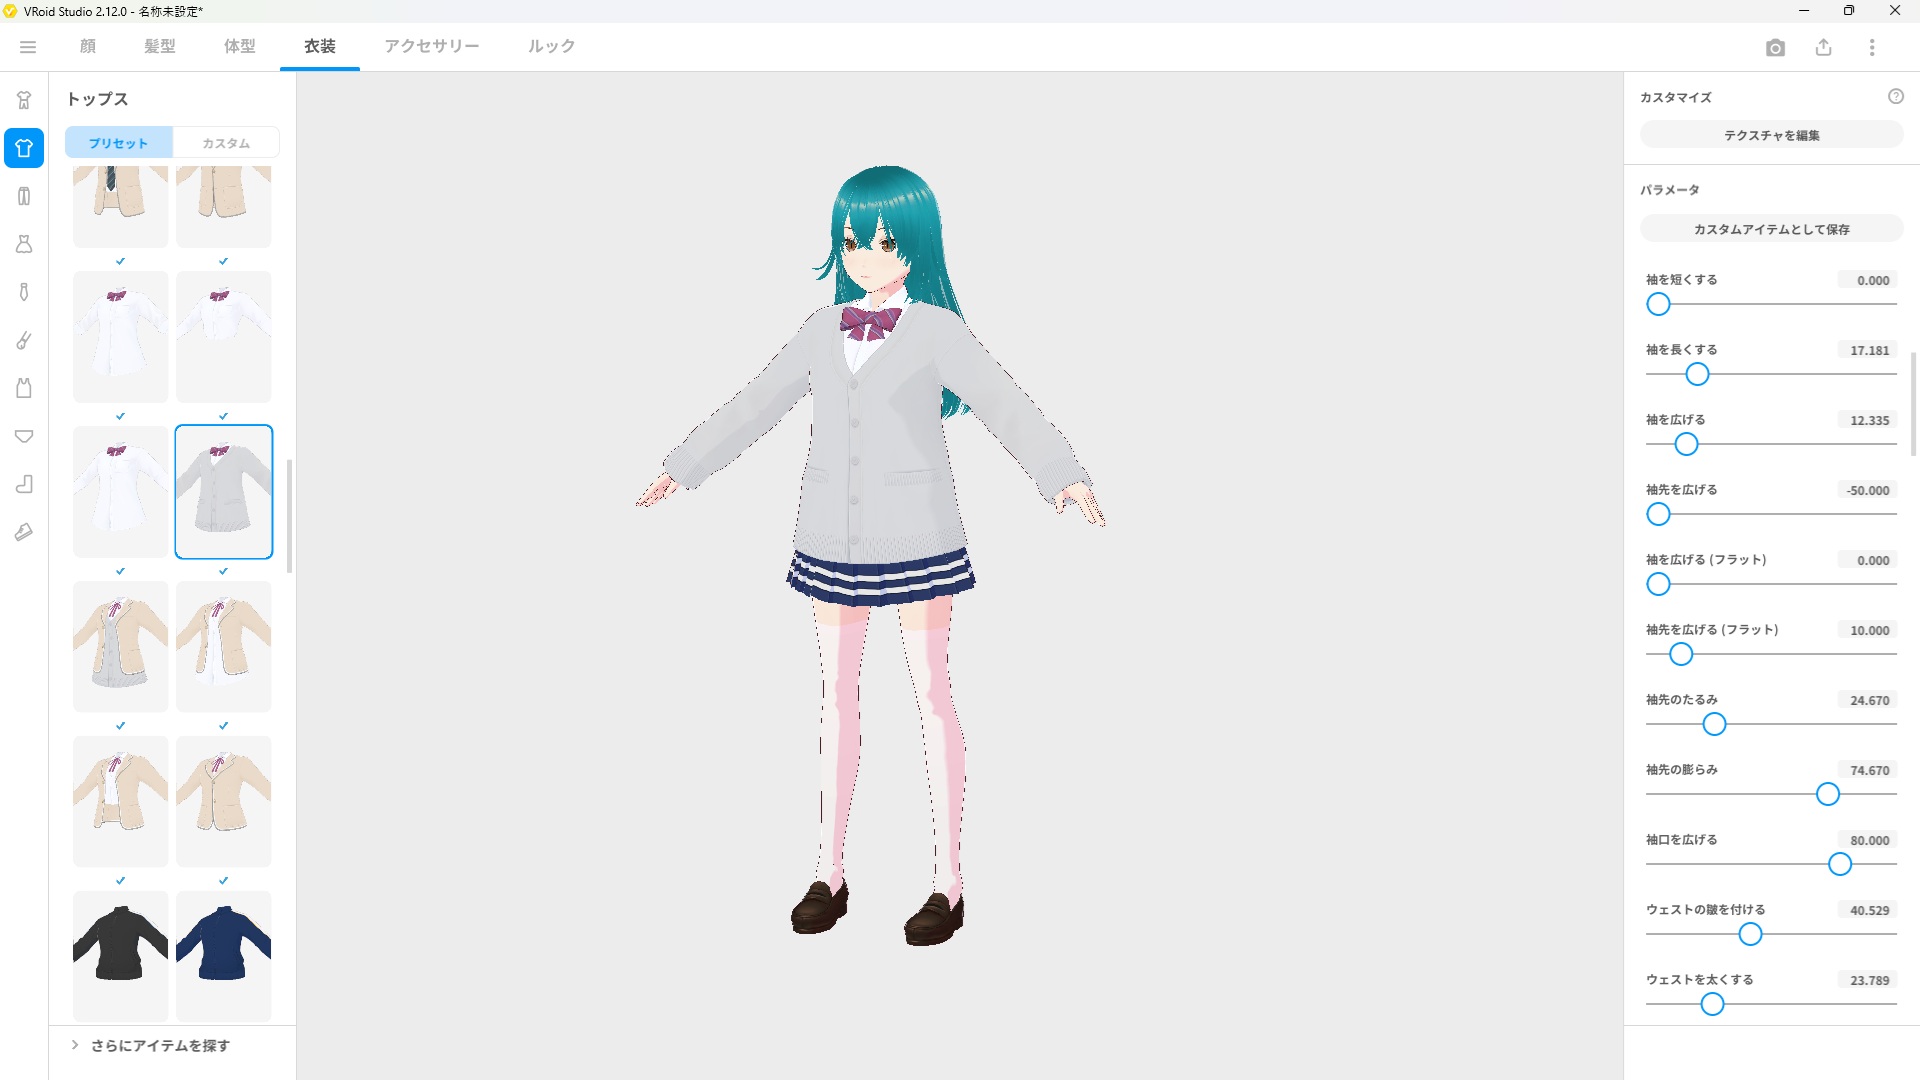
Choose from a wide range of preset outfits on the left. The right panel lets you fine-tune clothing parameters like sleeve length and collar style.
Select an outfit from the presets. Just like with the face and hair, you can adjust the details using the parameter sliders on the right side. Click different clothing categories on the far-left icon bar to switch between tops, bottoms, shoes, and more.
Step 5: Preview Your Avatar with a Pose (Optional)
Once you’re happy with your avatar’s look, try previewing it with a pose. Click the camera icon in the top-right corner to open the Photo Booth mode.
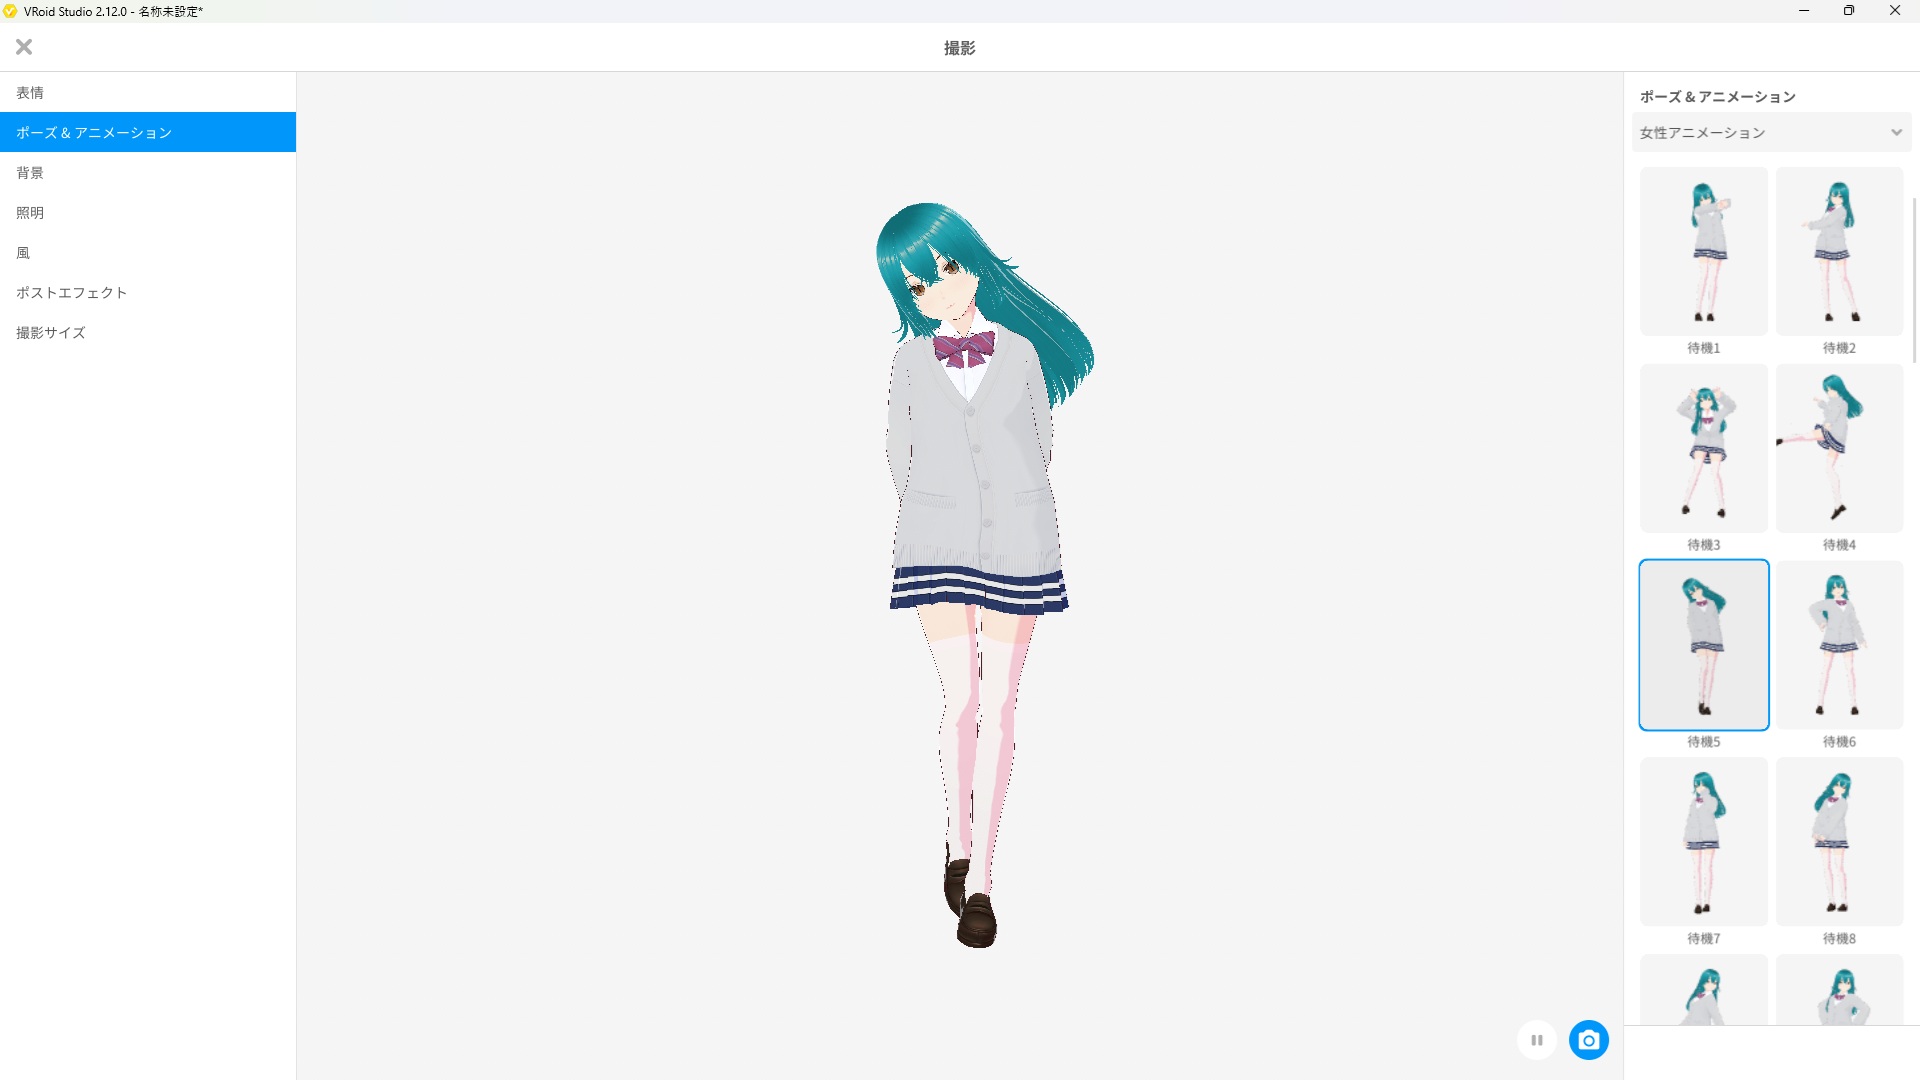
The Photo Booth lets you pose your avatar and take screenshots. Select a pose from the right panel and click the camera button at the bottom to capture.
In Photo Booth mode you can:
- Choose from preset poses and animations on the right
- Change the background, lighting, and wind effects
- Click the blue camera button at the bottom to take a screenshot
- Export the screenshot to share your avatar
Press the X button in the top-left to exit Photo Booth and return to editing.
Step 6: Save Your Avatar
When you’re happy with your avatar, save your work. Click the hamburger menu (≡) in the top-left corner of the editing screen.
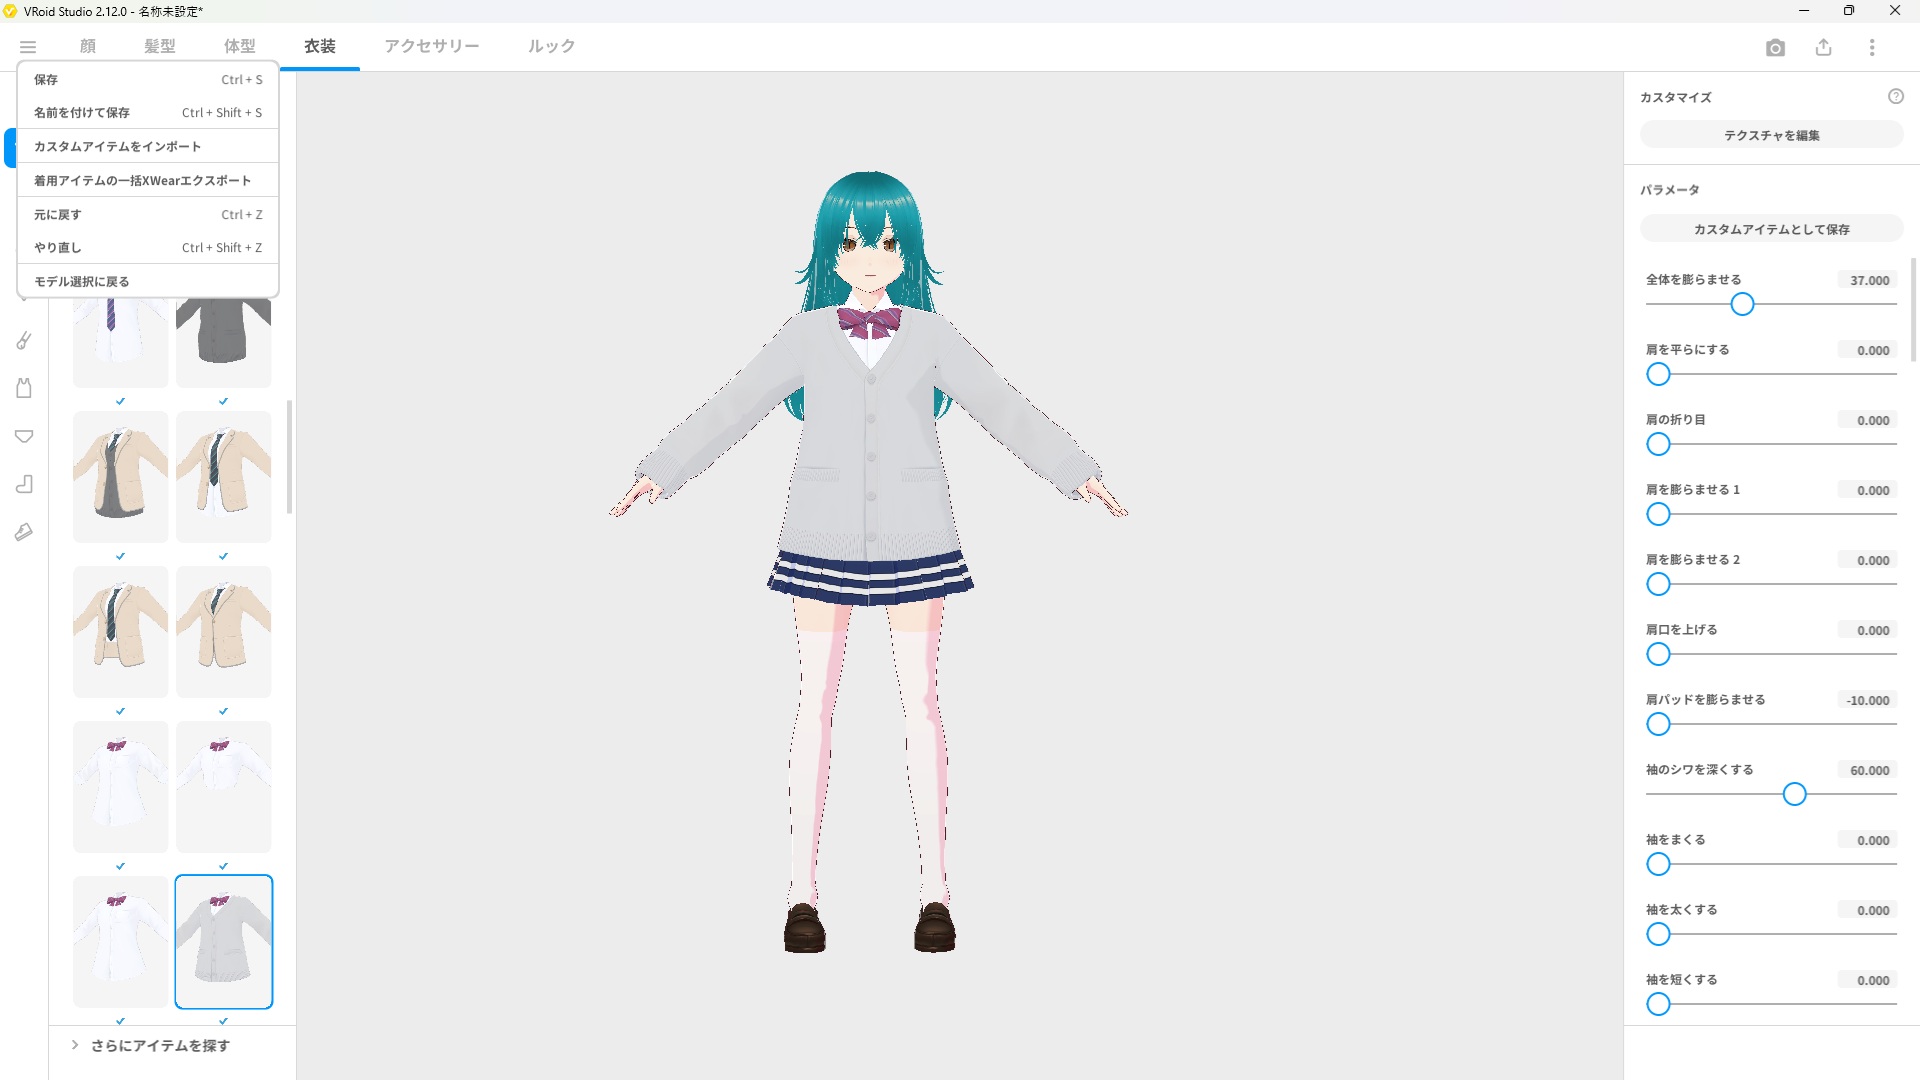
Click the menu icon in the top left to access Save and Save As options. Use Ctrl+S as a shortcut to save quickly.
You have two save options:
- Save (Ctrl+S) — saves over the existing file
- Save As (Ctrl+Shift+S) — saves a new copy with a different name
Your model is saved in VRoid Studio’s own format (.vroid). To use it in other apps like VRChat or Blender, you’ll need to export it as a VRM file — we cover that in a separate guide.
What’s Next?
Congratulations — you’ve created your first VRoid avatar! Here are some good next steps:
- [How to Export Your VRoid Model as a VRM File] — Use your avatar in VRChat, VTube Studio, and more
- [How to Edit Face Shape in VRoid Studio] — Deep dive into face customization
- [How to Create Custom Hair in VRoid Studio] — Go beyond the presets
Final Thoughts
VRoid Studio is surprisingly intuitive — even with no prior 3D modeling experience, you can put together a complete avatar without getting lost. The preset system does the heavy lifting, and the parameter sliders on the right panel let you add your own personal touch to every detail. The more you play with the sliders, the more your avatar starts to feel uniquely yours.