Last updated: April 2026
VRoid Studio is a Japanese software, which means it launches in Japanese by default. Don’t worry — switching to English takes less than 30 seconds. In this guide, I’ll show you how to change the language to English and give you a quick overview of the main interface so you can start creating your avatar right away.
Step 1: Switch VRoid Studio to English
When you first open VRoid Studio, the interface will be in Japanese. Here’s how to change it to English.
Click the three-dot menu icon (⋮) in the top-right corner of the screen, then select 設定 (Settings) from the dropdown menu.
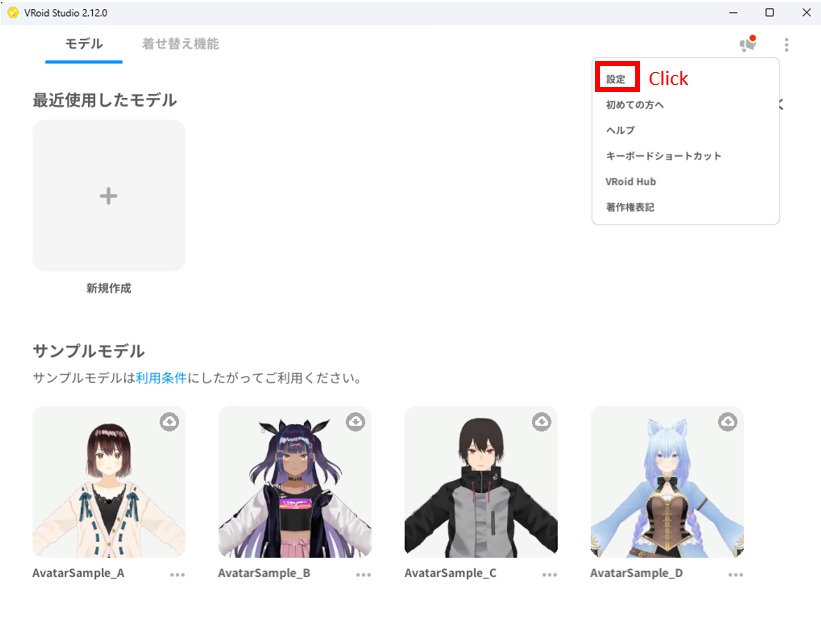
Click the menu icon in the top right, then select “Settings”.
In the Settings window, find the 言語設定 (Language) section at the top. Select English and the interface will switch immediately — no restart required.
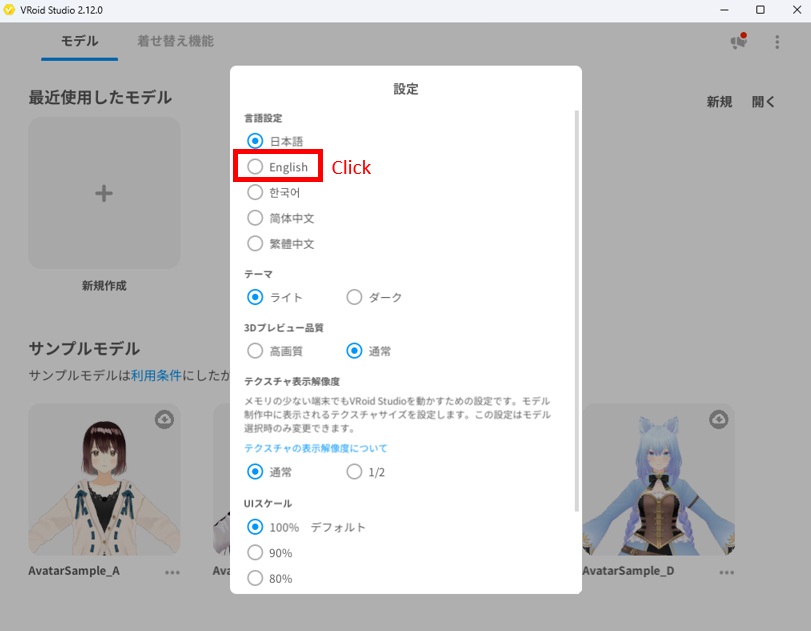
Select “English” to switch the interface language instantly.
That’s it! Your VRoid Studio is now fully in English.
Step 2: Understanding the VRoid Studio Interface
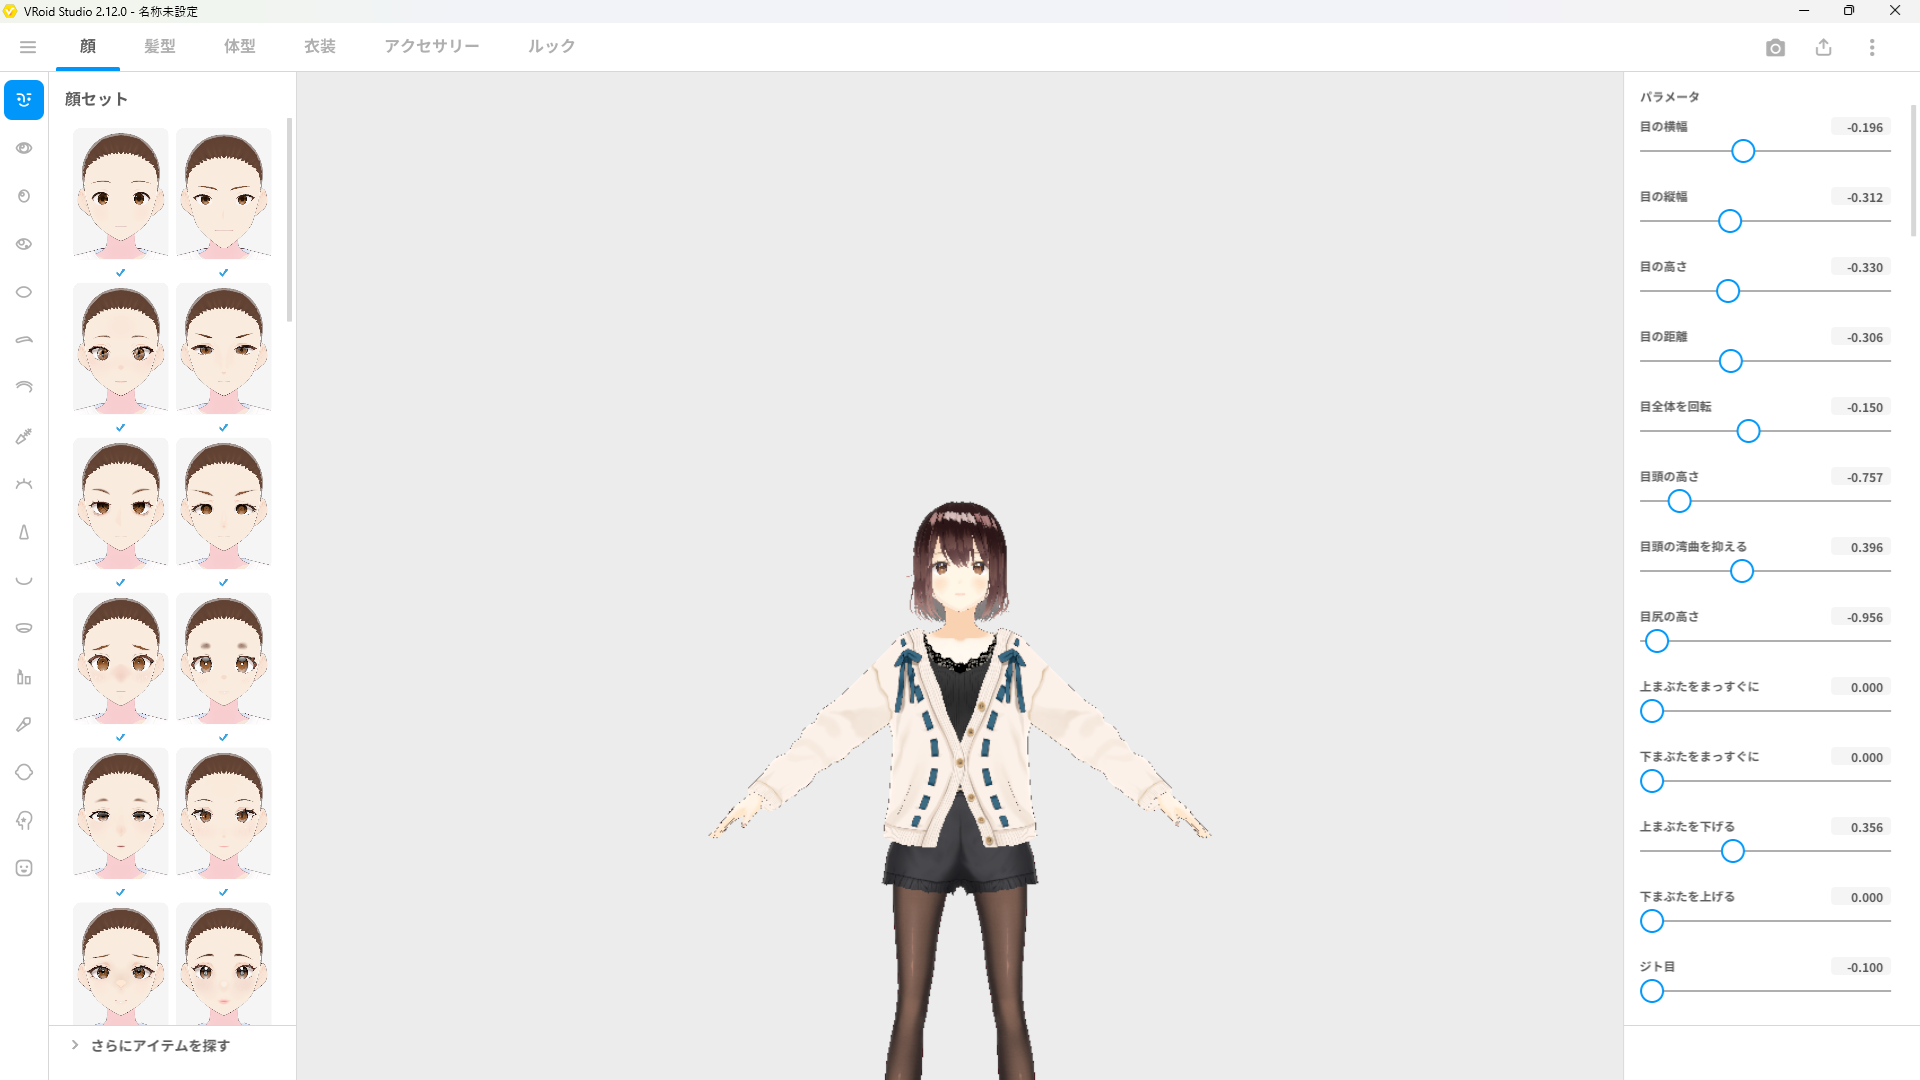
Once you open a model for editing, the VRoid Studio interface is divided into four main areas.
Here’s what each area does:
① Top Menu Bar
The tabs at the top — Face, Hair, Body, Outfit, Accessories, and Look — are the main editing categories. Clicking each tab switches the entire workspace to that category, letting you edit different parts of your avatar.
② Left Panel — Presets & Items
The left panel shows presets and selectable items for the current category. For example, under Face, you’ll see different face shape presets. Under Hair, you’ll see hairstyle options. You can click any item here to apply it to your model instantly.
The vertical icon bar on the far left lets you switch between subcategories — for example, switching from Eyes to Nose to Mouth within the Face category.
③ Right Panel — Parameter Sliders
The right panel contains sliders for fine-tuning your avatar’s features. These change depending on what you’ve selected in the left panel. For example, selecting “Eyes” will show sliders for eye width, height, distance, rotation, and more. Drag any slider left or right to adjust the value.
④ 3D Preview (Center)
The large area in the center is the 3D preview window. This shows your avatar in real time as you make changes. You can rotate the view by right-clicking and dragging, zoom with the scroll wheel, and pan by holding the middle mouse button.
Quick Tips for Navigating the Interface
- Rotate the model: Rignt-click and drag in the 3D preview area
- Zoom in/out: Scroll the mouse wheel
- Undo a change: Press Ctrl + Z
- Save your work: Press Ctrl + S or use the export button in the top right
What’s Next?
Now that your interface is in English and you understand the layout, you’re ready to start customizing your avatar. Here are good next steps:
- [How to Create Your First Avatar in 30 Minutes] — Build a complete avatar from scratch using presets
- [How to Edit Face Shape in VRoid Studio] — Deep dive into face customization
- [How to Create Custom Hair in VRoid Studio] — Style your avatar’s hair
Final Thoughts
VRoid Studio’s interface is designed to be intuitive — even without knowing the language, most users can figure out the basics quickly. Now that it’s in English and you know what each area does, you’re well on your way to creating your first 3D avatar. Let’s get started!