Last updated: April 2026
The eyes are one of the most expressive parts of your VRoid avatar. VRoid Studio gives you full control over the iris texture, color, size, and gaze direction — all without any external software. This guide walks you through every eye customization option available, from picking a preset to editing the texture directly.
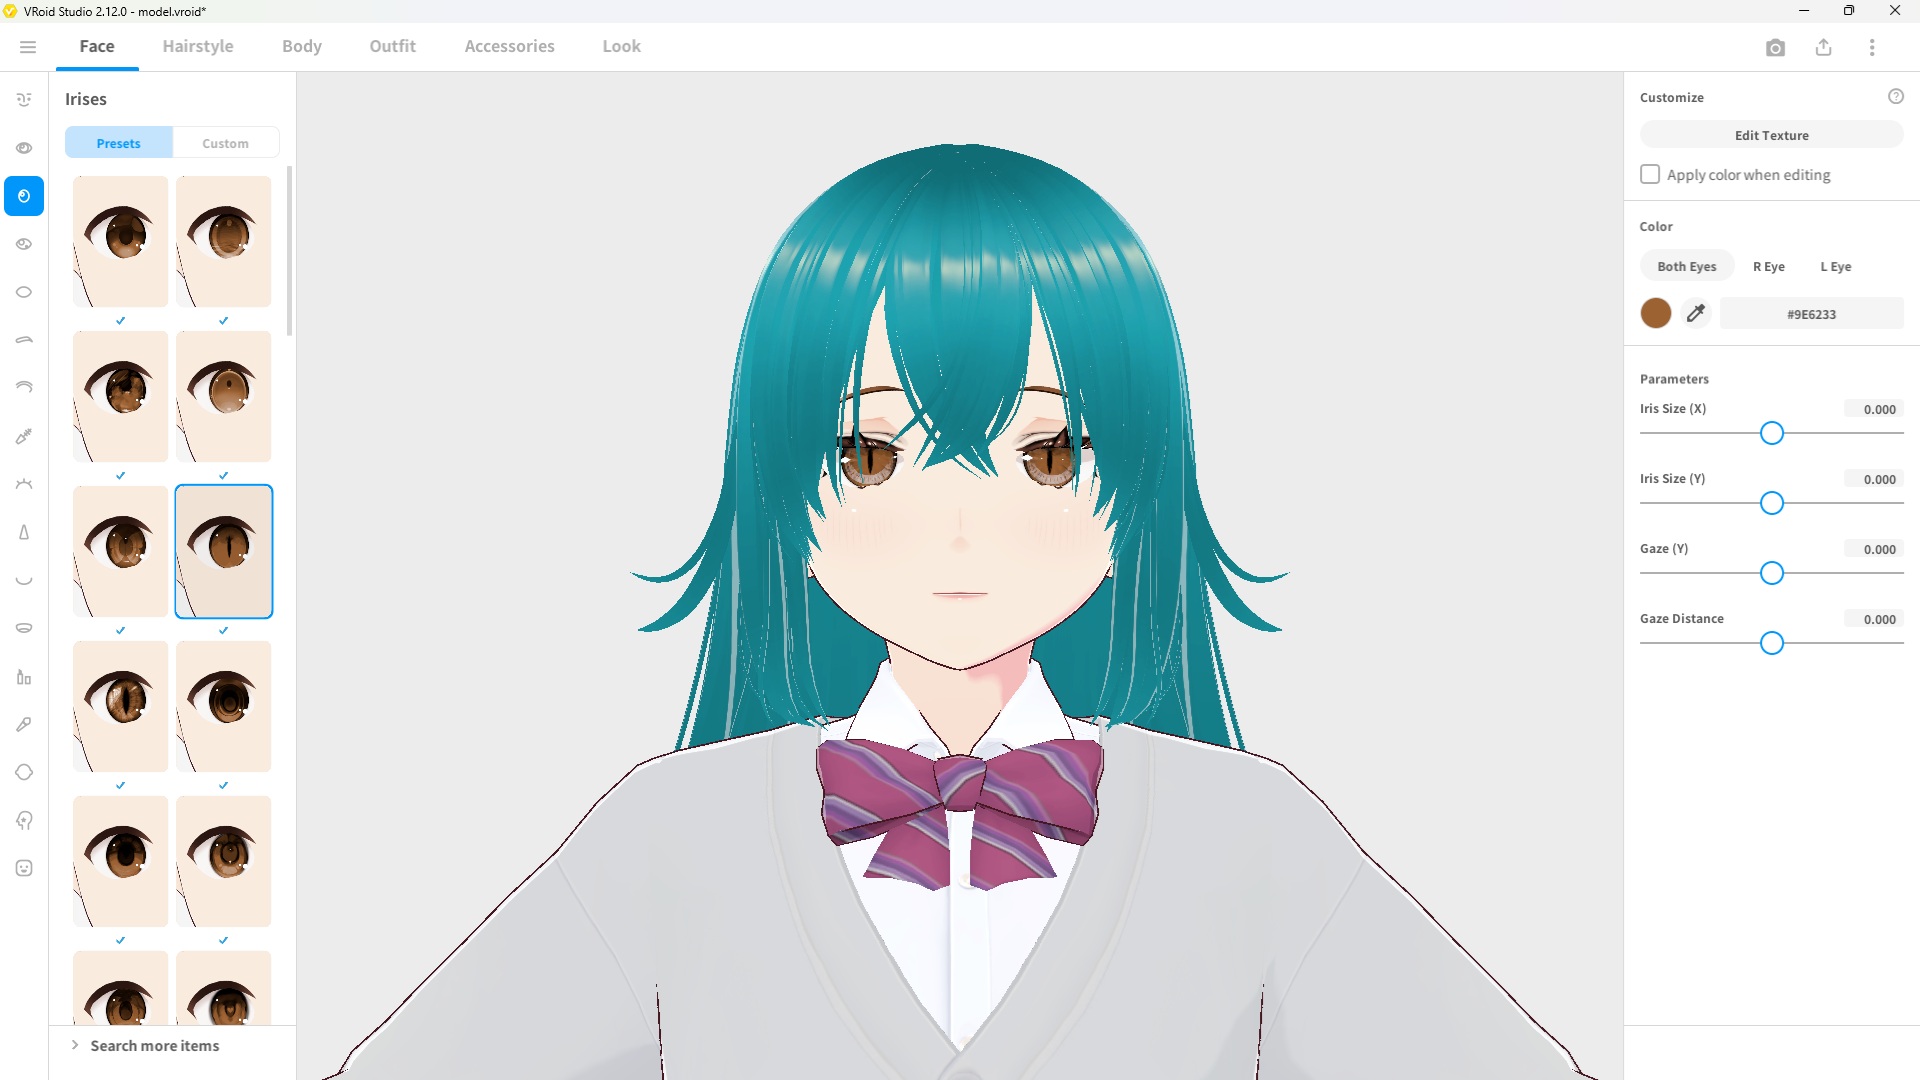
How to Open the Eye Editor
Click the Face tab at the top of the screen, then select Irises from the left panel. You’ll see a grid of iris presets on the left, and the customization options on the right.
Step 1: Choose an Iris Preset
The preset panel on the left shows a variety of iris styles — from natural round irises to stylized anime eyes. Click any preset to apply it instantly to your avatar. The currently selected preset is highlighted with a blue border.
Tip: Scroll down in the preset panel to see more options, or click Search more items at the bottom to browse additional presets from VRoid Hub.
Step 2: Adjust Color and Parameters
Once you’ve selected a preset, use the right-hand panel to fine-tune the details:
| Setting | What It Does |
|---|---|
| Color | Sets the iris color using a hex code or color picker. You can set Both Eyes, R Eye, and L Eye independently. |
| Iris Size (X) | Adjusts the horizontal width of the iris. |
| Iris Size (Y) | Adjusts the vertical height of the iris. |
| Gaze (Y) | Shifts the iris position up or down within the eye, changing where the avatar appears to be looking. |
| Gaze Distance | Controls how far apart the irises appear, affecting whether the avatar looks cross-eyed or wide-eyed. |
Tip: You can set different colors for the left and right eye by selecting R Eye or L Eye in the Color section — useful for a heterochromia look.
Step 3: Edit the Texture (Advanced)
For deeper customization, click Edit Texture at the top of the right panel to open the Texture Editor. Here you can paint directly onto the iris texture, adjust layer opacity, and change the drawing mode.

The Texture Editor splits the screen into two panels:
- Left panel (3D preview) — Shows your avatar with the changes applied in real time.
- Right panel (UV map) — Shows the flat texture of both irises, where you can draw and edit directly.
Key settings in the Texture Editor:
| Setting | What It Does |
|---|---|
| Color Calibration | Applies a tint color over the base texture. Enable “Use Color Calibration” to activate it. |
| Layer Opacity | Controls how transparent the current layer is (0–100). |
| Drawing Mode | Changes how brush strokes blend with the layer below (Default, Multiply, Screen, etc.). |
| Editing Mode | UV mode edits the flat texture directly; 3D mode lets you paint on the avatar in the viewport. |
Before and After
Here’s an example of the difference a color change makes. The left shows the default brown iris, and the right shows the same preset with the color changed to gold.

Frequently Asked Questions
Can I give my avatar different colored eyes?
Yes. In the Color section of the iris editor, select R Eye or L Eye and set a different color for each. This is how you create a heterochromia effect.
Can I import a custom iris texture from outside VRoid Studio?
Yes. In the Texture Editor, you can import an image file as a new layer. This lets you use custom iris textures made in Photoshop, Clip Studio Paint, or any other image editor.
Will the iris color I set show up in VRChat or other apps?
Yes, as long as you export your avatar as a VRM file. The iris texture and color settings are baked into the exported file and will appear in supported apps like VRChat and VSeeFace.
Can I reset the iris back to the default?
Yes. You can re-select any preset from the preset panel to reset the iris design. To reset individual parameter values, simply drag the slider back to the center (0.000) position.
What’s Next?
Now that your avatar’s eyes are looking great, here are some good next steps:
- [How to Draw Custom Eyebrows in VRoid Studio] — Customize the eyebrows to match your avatar’s style
- [How to Change Skin Color & Tone in VRoid Studio] — Adjust your avatar’s skin to complete the look
Final Thoughts
The eye editor in VRoid Studio is one of its most flexible features. Between the preset library, the color picker, the iris size sliders, and the full texture editor, there’s a huge amount of room for personalization — even without drawing a single line yourself. Start with a preset and a color change, and go deeper with the texture editor when you’re ready.